On the How to Become a Teacher page, we explain the process of how you can join PolyTripper as a valued teacher. Once you have been accepted as a teacher, you can follow the steps below.
Your
Teacher Profile page is the page students will go to when they want to know more about you, so it's very important that you set it up as completely as possible.
There are three places where you can provide information. The education and work experience will appear as separate tabs in your profile, once you've filled them in.
About: let the student know more about who you are, your teaching methods or anything else you want to share.
This text will appear both in your profile and on the Find a Teacher page.
Education: (optional) describe any type of education that has helped you become a better teacher. This can include
both formal education and self-study.
Work Experience: (optional) describe any type of work experience you've had, that has helped you become a better teacher.

You decide how much you want to charge for lessons and can change your prices whenever you want, as long as they are between $4 and $100. For every lesson you teach, you'll keep 95% of your earnings (minus payment processor fees) and 5% will go to us, to keep the website going.
You can set up your prices on the Prices page. You can choose simple prices or set up categories. You can read more about this on the Setting up Prices page.
It is very important that your timezone is set correctly. Read more about this on the Selecting Your Time Zone page.
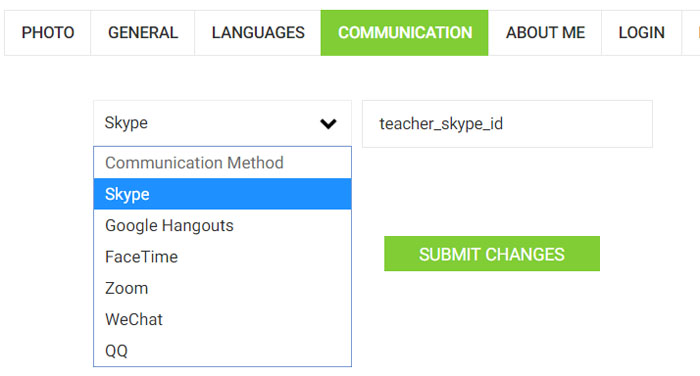
Make sure you've filled in your communication method(s). This is how you will communicate with your students during your lessons. If nothing is filled in, your teacher profile will not be active.

Unless you want to only teach instant lessons, you will need to set up your availability, so students can pick times where they would like to book a lesson with you. You can set this up on the Schedule page. A detailed explanation can be found on the Setting up Your Schedule page.
If you have followed all the steps above, then you should automatically appear on the Find a Teacher page. When a student requests a lesson with you, we will send you a link where you can either accept or decline the request. If you are declining, please send a message to the student to explain them why. If you are not receiving any lesson requests, either be patient or try lowering your prices a little, so students can get to know you. You can always increase your prices again later.
When a student has booked a lesson with you, they might have filled in lesson wishes, where they describe what they would like to do during the lesson. We will notify you if they have anything filled in. If they have not filled anything in, you might want to send them a message, asking them if they would like to work on anything in particular. This can help you prepare the lesson. The day of the lesson, send your student an invitation. Let them know that you are their teacher. You can find the communication method they've chosen and their communication id right on the lesson page.
When it is time to start the lesson, ask your student whether they are ready to start and if they say they are, call them. When the student answers the call, you are ready to start the lesson. If the student has not communicated with you beforehand what they would like to do during the lesson, make sure you ask them. You can find these and more teacher rules and tips explained on this page. Good luck!
After the lesson, the student will have 2 days to confirm the lesson. For instant lesson, the student gets 6 hours. If the student does not confirm, the lesson will be automatically confirmed. When the lesson is confirmed, you will receive your credits. Read more about these credits on the Teacher Credits page
After a lesson is confirmed, you will receive a notification that you can leave an optional comment for the student. Read more about these comments on the Comments for the Student page.